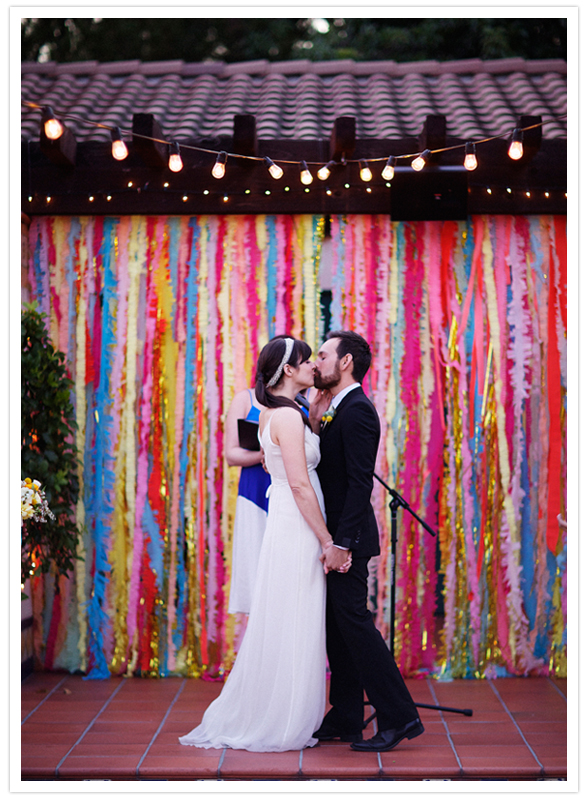
We’re all so excited for this tutorial this morning, aren’t we? Rachel‘s super super cute wedding really came together with her “statement” project… the streamer backdrop. We’ll let Rachel take it from here!

We knew we needed some kind of backdrop for the ceremony, because the layout of the venue had us getting married in sort of an awkward location. The backdrop would serve to make the ceremony area stand out and would also hide the french doors with their cheap vertical blinds that would otherwise be directly behind us.
We thought about painting a sheet, just as we did the tablecloths, and I still think that would have been a great option. But we liked the idea of the color and movement that the streamer backdrop would give us. I’d seen some pretty photos floating around of ribbon streamers and I was imagining something like that, but with this fringey crepe paper instead.

Please note, if you have extreme color matching needs, they will not be satisfied by the usual suppliers of cheap crepe paper. And fancy crepe paper is expensive. We decided to go with a range of colors to give us the overall effect of our color scheme (which was supposed to be teal/turquoise + coral + sunny yellow but got boiled down to blue + pink + yellow in the crepe paper world).
Supplies:
Wooden dowels, in the length you need to cover (we had two 5′ dowels and three 3′ dowels) – $5
Hot glue gun + glue (already had the gun) ~ $10 on glue sticks
Crepe paper folds (I used 27 packages for a lot of coverage) $40
Additional fancy crepe paper (if desired) $50 (you don’t need as much as I bought!)
Metallic gold fringe (if desired) $25
Hot glue gun + glue (already had the gun) ~ $10 on glue sticks
Crepe paper folds (I used 27 packages for a lot of coverage) $40
Additional fancy crepe paper (if desired) $50 (you don’t need as much as I bought!)
Metallic gold fringe (if desired) $25
1. Choose your materials.
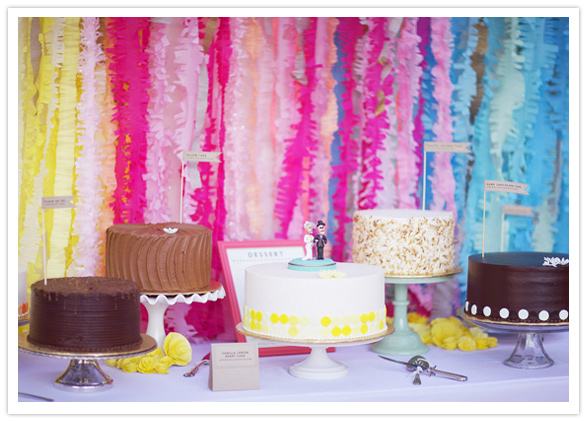
I bought plenty of cheap crepe paper from this store and they ship really fast! They sell the Cindus brand of crepe paper that is fairly common online, so you can find it from other sources as well. In total, I ordered 27 packs (3 each of 9 different colors) and I used most of it but not all of it. With shipping, that came out to $40. Keep in mind that I was making a 10 foot backdrop for our ceremony (out of two 5′ dowels) as well as three 3 foot backdrops to layer behind the dessert buffet, so you might not need nearly that much.

I wanted a little bit of additional color that was closer to our real colors, so I ordered some fancy crepe paper from Castle in the Air, which has a much wider range. I picked out four shades of color and added a package of gold (which is not metallic-shiny and isn’t doublesided, but I still ended up loving the overall effect it added). With shipping, that cost $50. I bought too much, FYI.
And of course, I couldn’t resist having a bit of sparkle in there. The gold metallic fringe was from Oriental Trading Company, but I think you can get it lots of party stores. I ordered four of the curtains (double check the size – they are only 3ft wide!) to span our 10 foot ceremony backdrop for $25 (a little less, actually, because I searched for an online coupon that got me free shipping + a discount).
2. Cut your streamers.
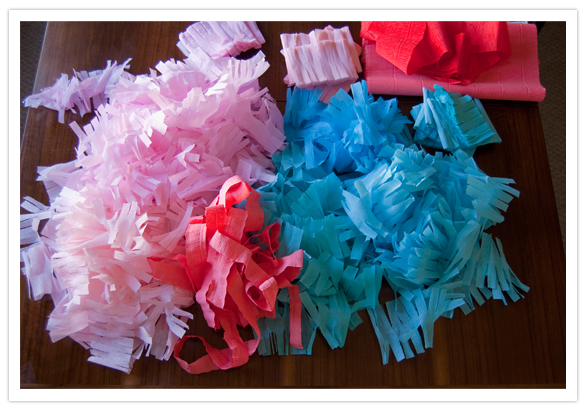
With the cheap crepe paper, I used Jordan’s excellent tutorial on fringe-y streamers. So easy! You can also cut some straight pieces of varying sizes with pinking shears for a textured edge but no fringe. Just follow the tutorial but you only have to do the first step and use pinking shears instead of regular scissors.
The fancy crepe paper is THICK and it comes in rolls rather than folds. This made it much harder to work with and I didn’t end up incorporating as much of it as I would have liked. The most effective way to work with it was to unroll it and then fold it, but make the folds much deeper than the thin crepe paper. I ended up getting so frustrated trying to cut fringed streamers from this that I just cut strips of varying sizes using a rotary blade. Once you have a strip cut, gently stretch it out so you get more length from it.
You can do without the fancy paper altogether if you like, but I think it added a nice depth of color, even in the limited quantities I used it in. A little goes a long way, luckily!
As you’re creating your streamers, keep them in separate piles by color and shade. This makes it a little easier when you start assembling.
3. Assemble!
Getting the dowel in a good place to work was the hardest part for me! I tied mine with fishing line and hung it right under the blinds in my apartment and then worked on a stepstool. You could easily work with it on a table (cover it with paper or something first!), and avoid the hassle of finding somewhere to hang it. Just make sure you step back once in a while and check to see how it is looking when you hang it.
Start with a single shade and glue strips to the dowel at random(ish) intervals. For each piece you’ll want to use the glue gun to put glue on the dowel and then carefully press the strip onto the glue. Carefully! The paper is thin, and you can get burned right through it. Wear gloves if you have a tendency to burn yourself with hot glue. Don’t worry if it doesn’t look perfect at this point. You don’t want to use up ALL your paper right now, you’re just getting a good start on it.
Repeat with each of the remaining colors.
At this point, you should have a decent distribution of colors and you’ll just want to start layering and filling in as needed.
I needed our ceremony backdrop to be very full (it was covering a not so nice looking set of french doors) so I went back over it several times, always stepping back to see the overall effect once in a while.
The dessert buffet didn’t need quite as much coverage, so it took significantly less time and paper.
4. Optional – Add metallic fringe!
Apply the gold fringe to the back of the dowel. The fringe comes with a solid portion on the top, so I just tacked that down with hot glue applied directly to the dowel and then pressed the solid portion over it well (again, carefully!).
5. Pack it up
Voila! You have a gorgeous, enormous, fluffy backdrop and now you have to transport it somewhere (unless you are getting married in your living room, which is awesome). I was totally befuddled at this point. The solution we came up, that ended up working beautifully, was to spread out a clean dropcloth or sheet and lay the backdrop on top of it, spreading the streamers out straight out so that it looks like it would if it were hung. Then, starting with the dowel end, gently roll the streamers up, leaving the sheet on the ground for now. Don’t try to do this too tightly, you’re just rolling them gently. They barely weigh anything, so you’ll just have a fluffy streamer cigar. Now take one end of the sheet and wrap it around the streamers, rolling it until it completely encases them. Tuck the ends un

6. Hang them
This will depend on your space, so make sure you work this detail out before you get started! We hung ours directly from the rafters at our venue, which meant all we needed was clear fishing line and a ladder. On the actual wedding day, we unrolled the streamers and tied the dowels to the rafters. We fluffed the streamers up and re-arranged them a bit and flipped some of the gold fringe over so that it was more visible in the front. Our ceremony backdrop was in a walkway, so we brought some ribbon and kept them tied back like curtains except during the actual ceremony, which made for a nice reveal when the backdrop actually came down (or so I assume, because I was waiting impatiently outside at the time!).
der or tie them off (loosely) and the streamers will transport easily and fluff right back into shape for the wedding.

Total costs
All in all, we spent about $130 on this project (which will be lower in most cases since you won’t have as much trial and error as I did) + 2 burned fingers (I’m a little careless with the glue gun) + 3 – 4 hours of my time and it was our biggest impact DIY. I know you probably aren’t supposed to say this about your own projects, but I absolutely LOVE how it turned out.
****
We love it too! It’s so fun and so festive and so beautiful. The use of different colors and textures and fringe makes for a really outstanding focal point for any festive occasion! ESPECIALLY a marriage ceremony, of course. And… you can buy Rachel’s in the Marketplace if you’re quick!
No comments:
Post a Comment